How to Add MX Records for Google Workspace Email Setup
To add MX records for Google Workspace (formerly G Suite), follow these steps to ensure proper email functionality.
Before Starting
- Changes to MX records may take up to 72 hours to process
- If email stops working after adding new records, remove all MX records and start fresh
- For third-party domains, refer to Google's specific documentation
For Squarespace-Managed Domains
- Check Existing MX Records:
- Navigate to domains panel
- Select your Squarespace domain
- Click DNS settings
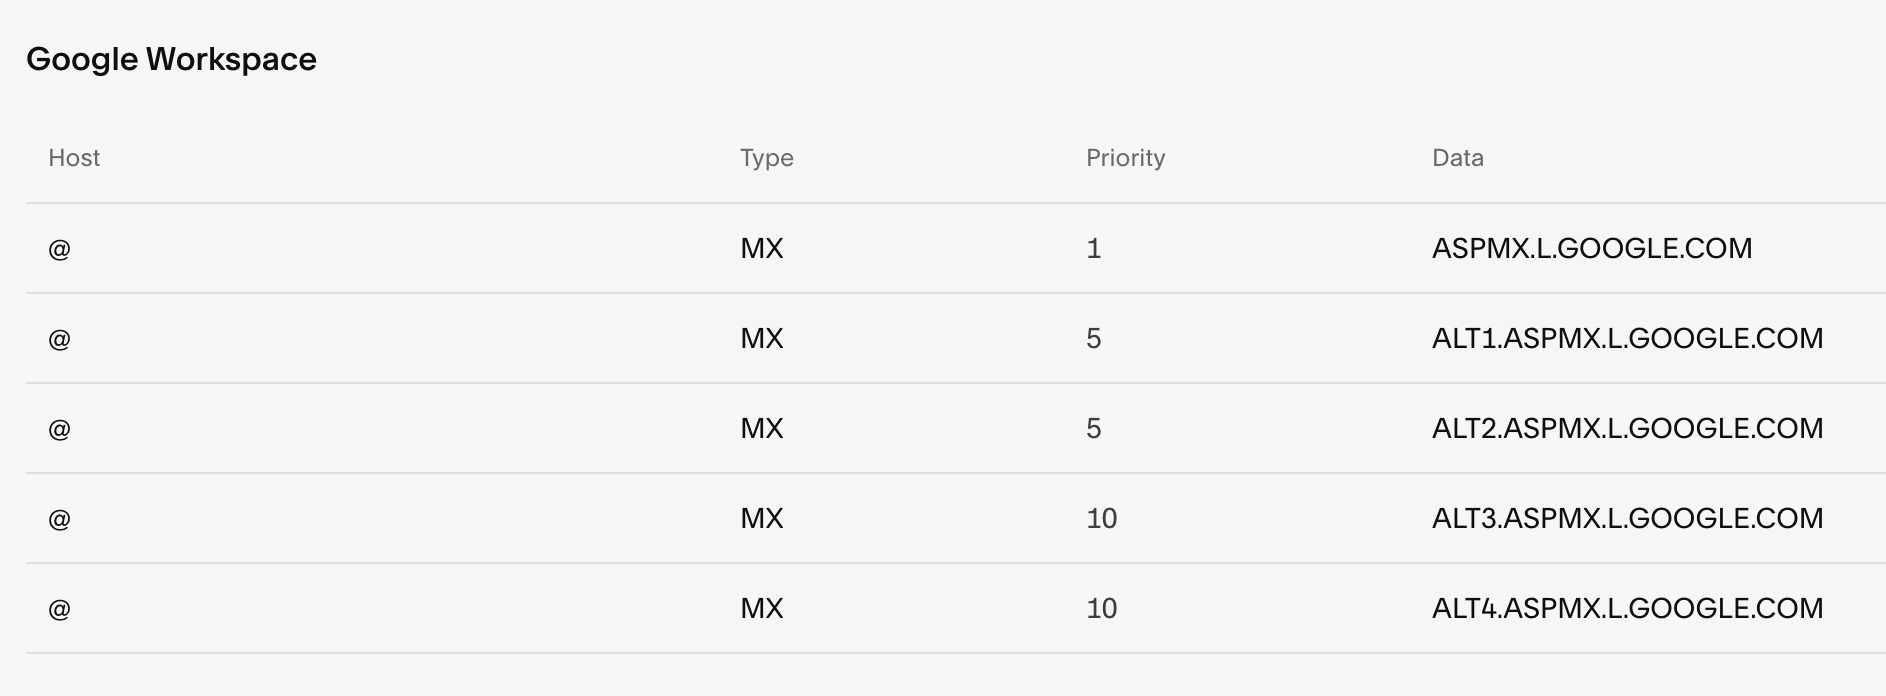
- Look for Google Workspace MX records
Your records should match one of these formats:

Google Workspace Admin Panel
Or a single record:

Google DNS Records Table
- Add Missing Records:
- If records are missing, select "Google Workspace MX" from the Add preset dropdown
- This automatically adds all required records
- Only keep one set of records (either five individual or one combined)
For Third-Party Domains:
- Add MX records through your domain provider's DNS settings
- Follow instructions received via email after signup
- Refer to Google's documentation for provider-specific steps
For Subdomains:
- Navigate to DNS settings
- Click Add Record under Custom Records
- Enter subdomain in Host field
- Select MX as Type
- Set Priority to 10
- Enter smtp.google.com in Data field
Important:
- Wait up to 72 hours for changes to take effect
- Remove all existing MX records before adding new ones if experiencing issues
- Contact support if email isn't working after 72 hours
Related Articles

DNS Propagation: Why Domain Changes Take Up to 48 Hours

