How to Connect Your Domain: DNS vs Nameserver Settings Guide
A third-party domain can be connected to Squarespace using either nameserver connection or DNS connection. Each method has specific use cases and setup requirements.
Nameserver Connection
- Recommended for domains from GoDaddy, Namecheap, or Network Solutions
- DNS records are stored with Squarespace
- Simple setup process through guided steps
- Edit DNS records directly in Squarespace dashboard
DNS Connection Use this method if your domain has:
- Custom DNS records
- Multiple subdomains
- DNSSEC enabled
- Complex domain settings (glue records, forwarding)
- Security services like Cloudflare or AWS
- DNS records remain with your domain provider
- Requires manual setup of CNAME and A records
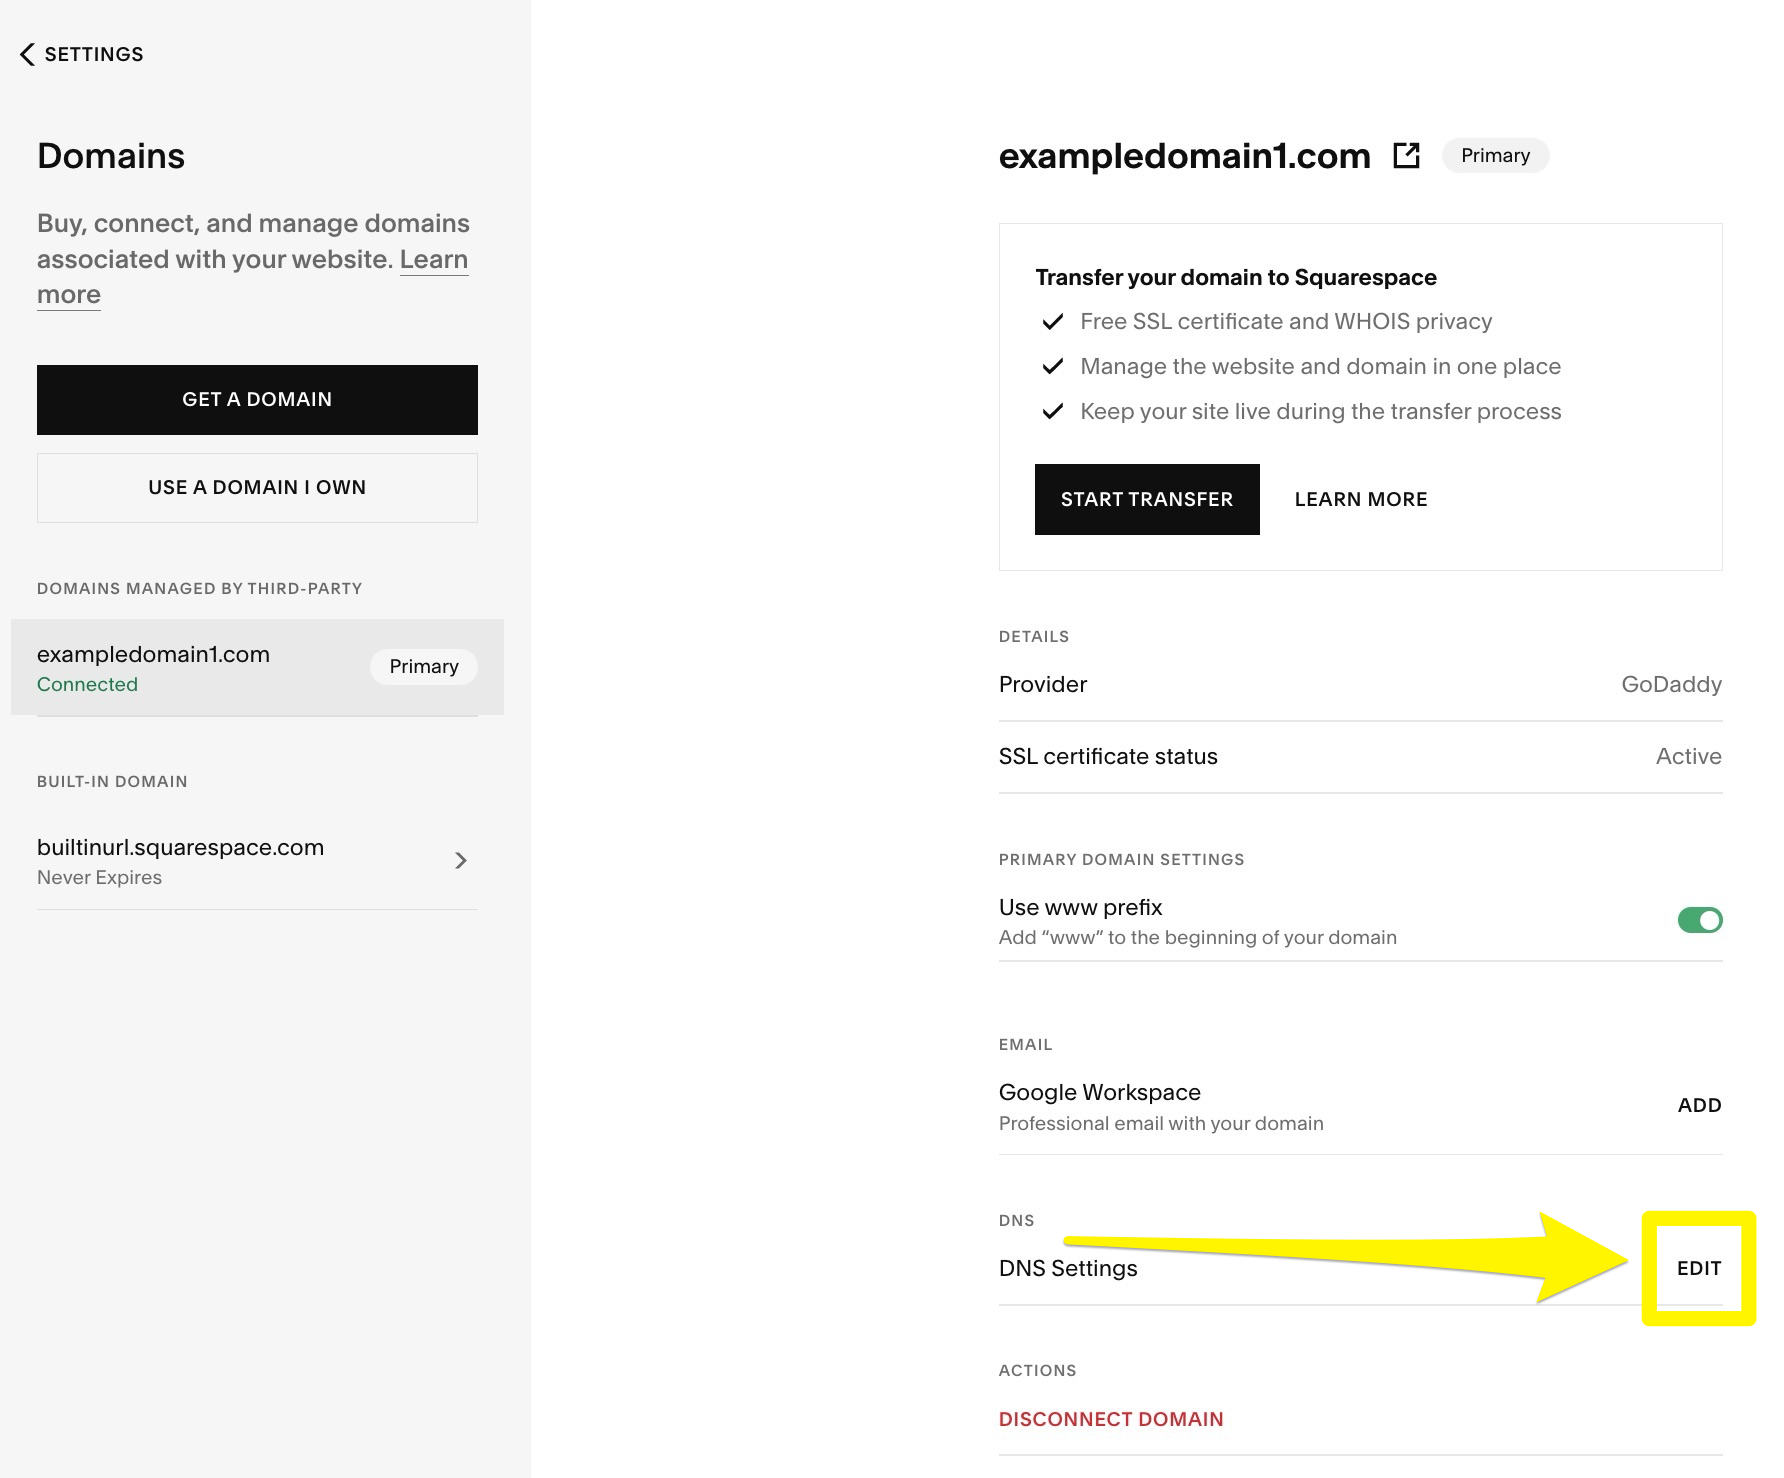
Squarespace DNS settings screen
Switching from Nameserver to DNS Connection
- Open Domain panel
- Click "Use my Domain"
- Enter domain name
- Click "Connect Domain"
- Select "No, I will use DNS records"
- Choose domain provider
- Sign in to provider account
- Complete connection process
When to Switch:
- When using custom email services
- Need to maintain custom DNS records
- Using third-party security or traffic services
- Required to keep DNS control with original provider
Check Current Connection: View your connection method in the Domain panel under your domain settings.
Edit DNS Records:
- Nameserver Connection: Edit through Squarespace dashboard
- DNS Connection: Edit through domain provider's dashboard
This method ensures all domain features and services continue working while maintaining connection to your Squarespace site.
Related Articles
DNS Propagation: Why Domain Changes Take Up to 48 Hours