How to Create and Sell Online Workshops with Squarespace: A Step-by-Step Guide
Sign up customers for your workshops using Squarespace's integrated e-commerce tools by combining services and events functionality. Here's how to set it up:
Step 1: Create Workshop as Service Product
- Navigate to Pages menu
- Open existing Shop page or add new one
- Click + icon and select Service
- Add workshop details:
- Name (include date if offering multiple sessions)
- Description
- Images
- Workshop details

Man doing yoga on wooden floor
Step 2: Configure Workshop Settings
- In Inventory section:
- Set participant limit (or choose Unlimited)
- Set pricing
- Configure availability

Inventory settings in Squarespace dashboard
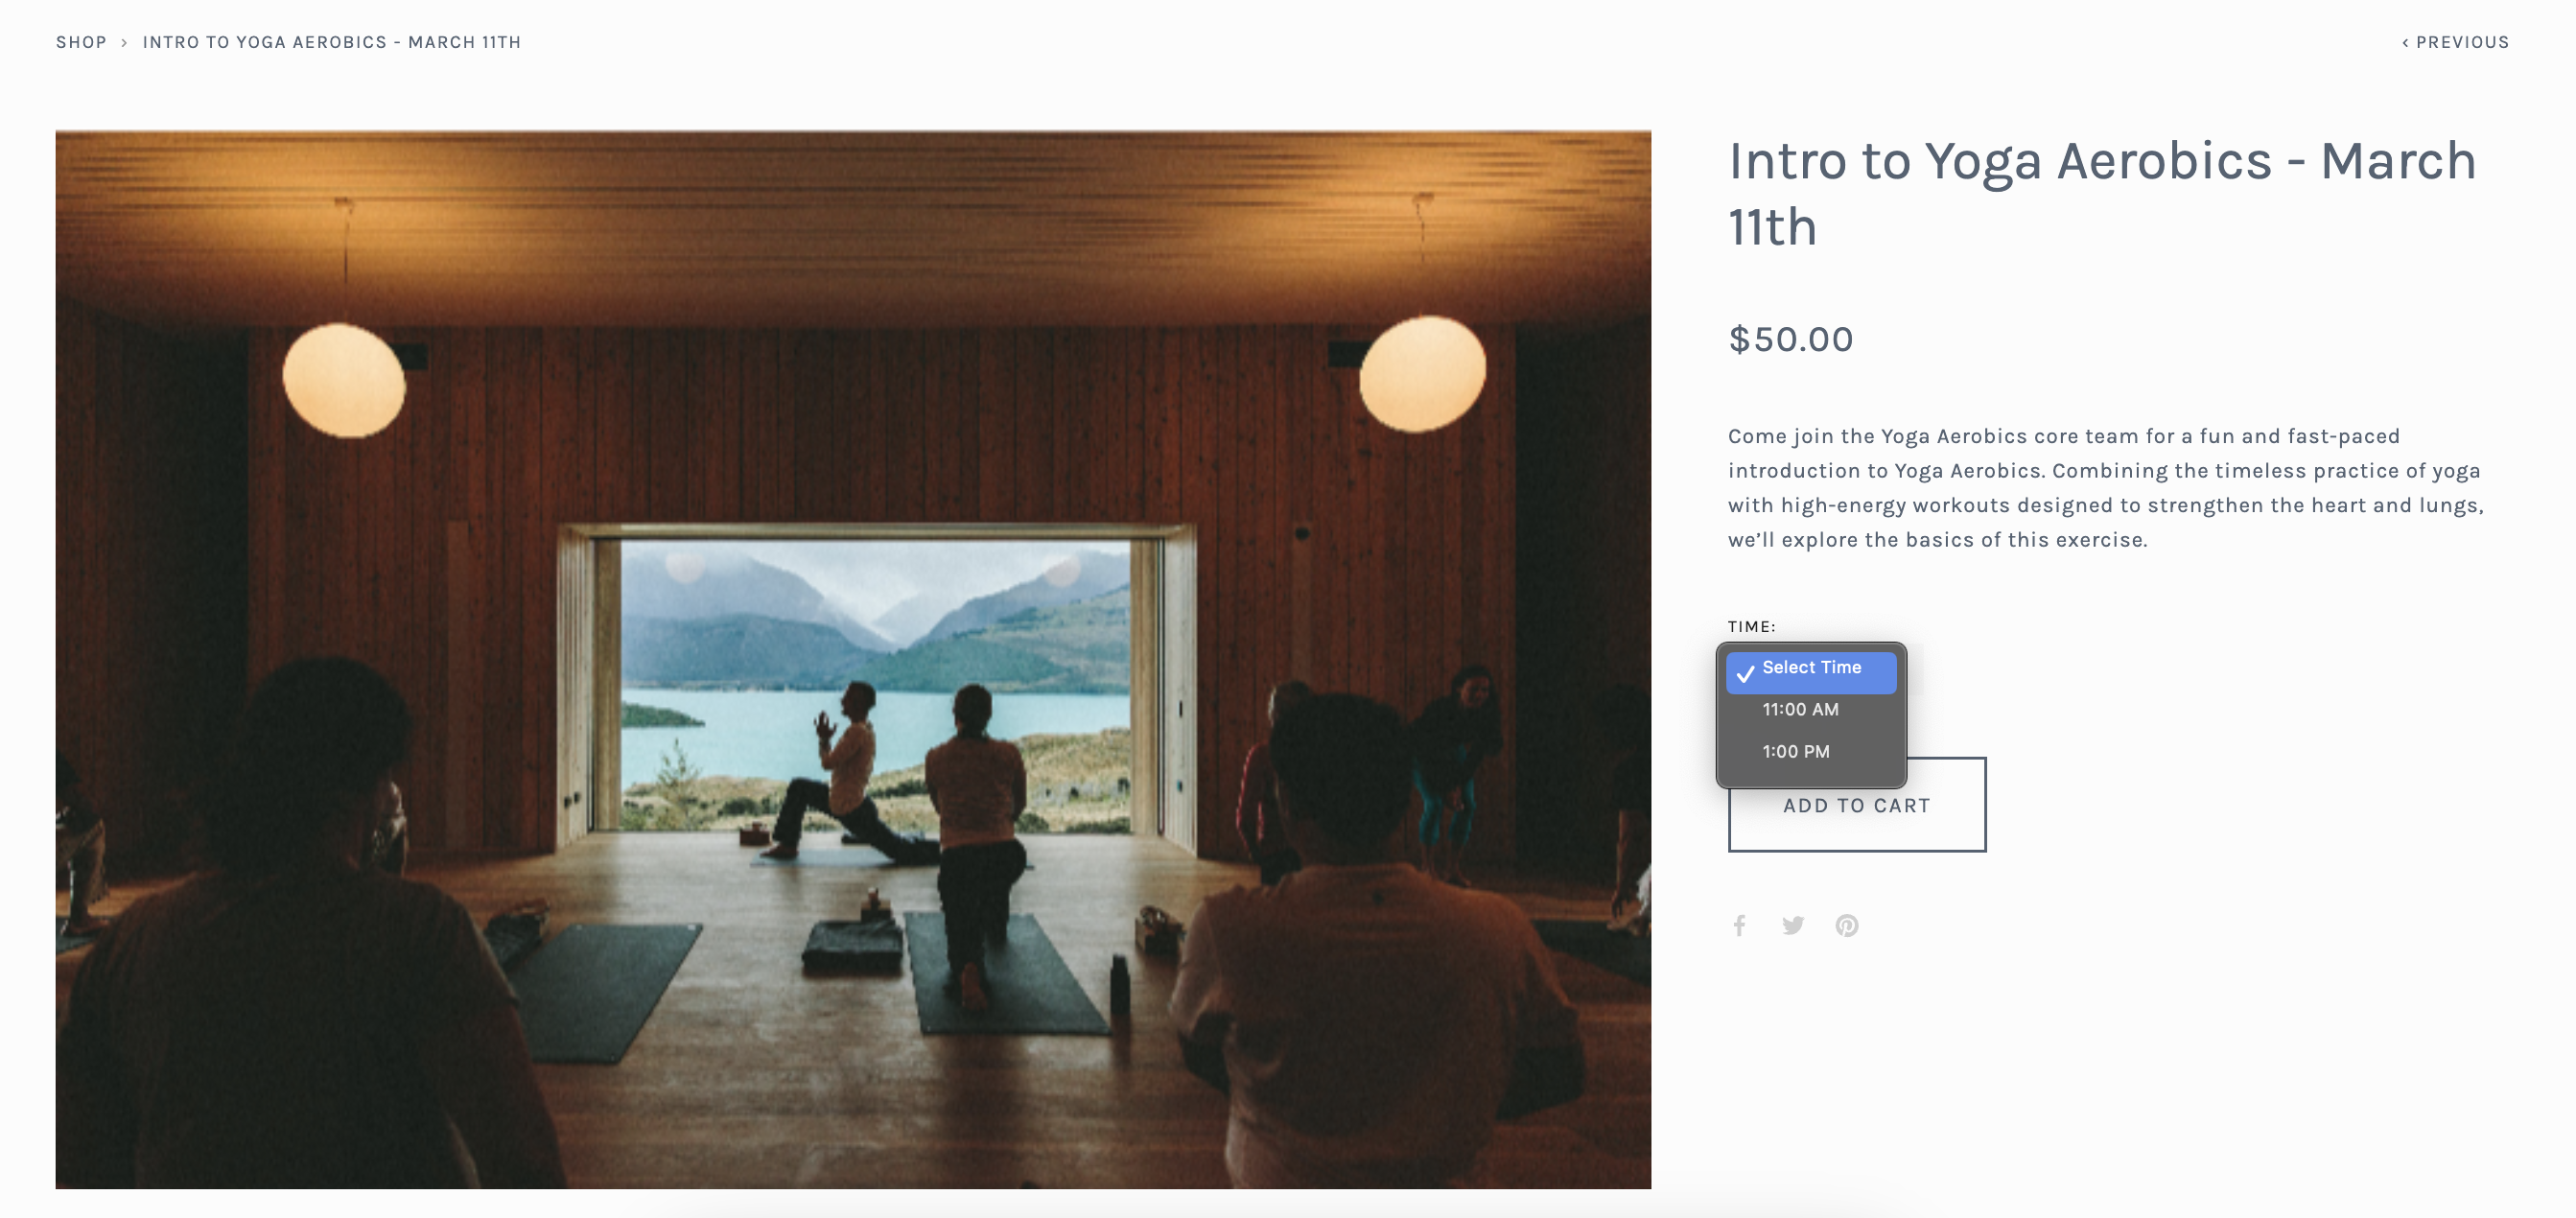
Step 3: Add Time Variants (Optional)
If offering multiple sessions:
- Scroll to Inventory section
- Click Add under Variants
- Select Custom from dropdown
- Add time slots
- Set specific prices and inventory for each variant
People practicing yoga on mats
Step 4: Create Events Page
- Add new Events page
- Click + to create event
- Enter workshop details:
- Title (match product name)
- Date and time
- Description
- Add product block:
- Click + in description
- Select Product
- Search and select workshop
- Adjust display settings

People doing yoga on mats
Final Steps
- Publish workshop product and event
- Optionally move Shop page to "Not linked" section
- Repeat process for additional workshops
- Test booking process
This setup allows customers to easily browse your workshop calendar, register, and pay directly through your website.
Related Articles

How to Switch from Stripe to Squarespace Payments: A Complete Guide