How to Set Up Your First Squarespace Site: Step-by-Step Guide
Bring your business or brand online by creating a professional Squarespace website. Follow these essential steps to build your site effectively.
Structure Your Site
- Add pages in the Pages panel:
- Click + next to Main Navigation
- Choose page type or use pre-built layouts
- Enter page title and set your homepage
- Arrange pages in your desired order
- Customize your site header:
- Click Edit in site preview
- Add logo, social media icons, and call-to-action buttons
- Include shopping cart if needed

Yellow arrow points to circle
Add Content
- Use blocks for basic content:
- Text, images, buttons, and features
- Click + to add sections
- Use drag-and-drop to arrange blocks
- Save changes before exiting
- Create collection pages for:
- Blog posts
- Products
- Events
- Portfolio items
Set Up Your Store (Optional)
- Essential store setup steps:
- Add products to your store page
- Connect payment processor
- Configure shipping options
- Set up tax rates
- Customize checkout experience
Style Your Site
- Edit site-wide styles:
- Choose fonts and text sizes
- Select color palettes
- Add animations
- Adjust spacing
- Customize individual sections:
- Modify layouts
- Change backgrounds
- Adjust display options
Create a Style Guide:
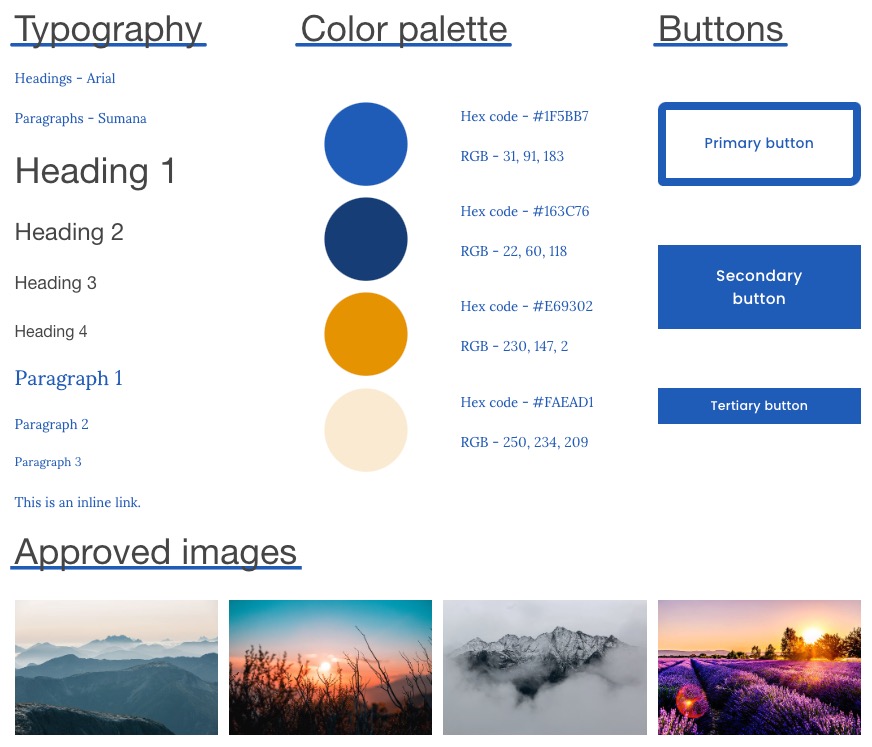
Style guide for website design
Document your:
- Color codes
- Typography choices
- Logo variations
- Layout specifications
- Image guidelines
- Editorial standards
Before Launch
- Review site launch checklist
- Test all functionality
- Upgrade to a paid plan
- Ensure SEO optimization
- Check mobile responsiveness
Remember to regularly update your content and maintain consistency across all pages for the best user experience.
Related Articles
Why Professional WordPress and SEO Services Are Essential for Your Business Success