How to Add Custom CSS and Files to Enhance Your Squarespace Site Design
Apply custom CSS to style your Squarespace site with advanced font, color, and background options not available through built-in settings. Use CSS modifications only for styling purposes to avoid potential site issues.
Adding CSS Code:
- Open the custom CSS panel
- Click [Open in New Window] for an expandable editor
- Add your custom code
- Click [Save] to publish changes
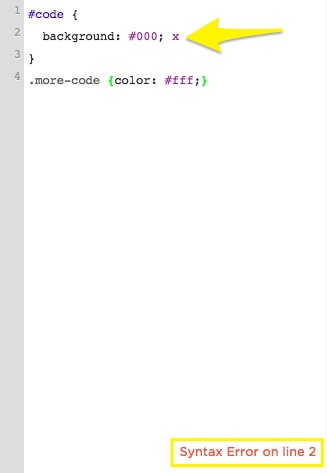
Line numbers appear on the left to help reference code sections. Syntax errors display in red at the bottom.
Error code 100009 displayed
Working with Custom Files:
- Click [Custom Files] under the CSS Editor
- Click [Add Image or Font] or drag files to upload
- Supported file types:
- Images: .jpg, .png, .gif
- Fonts: .ttf, .otf, .woff
- Note: .svg files not supported
Using Custom Files in Code:
- Write your code until you need the file URL
- Place cursor at the desired location
- Click the file to automatically insert its URL

Blue and orange metal frame
Important Notes:
- Custom CSS doesn't transfer when switching templates in version 7.0
- Update file URLs when changing SSL settings
- If SSL is enabled:
- Open CSS editor
- Click [Manage Custom Files]
- Click the file
- Update URL to start with https
- Save changes
For additional support:
- Review the Custom Code FAQs
- Consult the Basic Guide to Code-Based Customization
- Visit the Squarespace Forum
- Consider hiring a Squarespace Expert for custom solutions
Related Articles

Troubleshoot Image Trimming Issues: A Complete Guide to Squarespace Image Display