How to Add MX Records for Google Workspace Email Setup
Adding Mail eXchanger (MX) records is essential for proper email functionality with Google Workspace. Here's how to set them up:
For Squarespace-Managed Domains:
- Check Existing MX Records:
- Access Domains dashboard
- Select your domain
- Click DNS settings
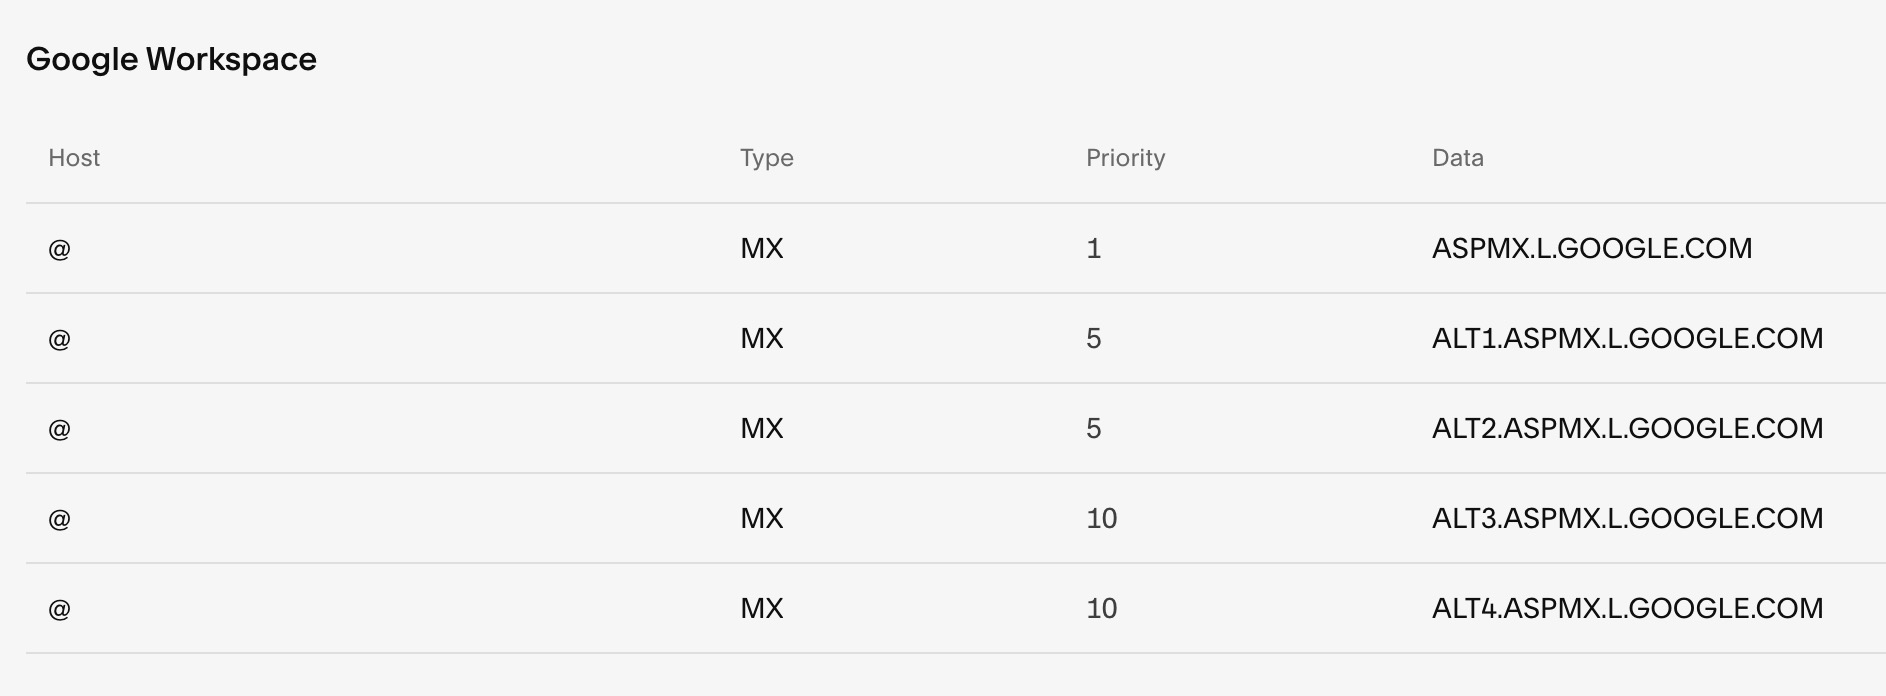
- Look for Google Workspace records

Example Google Workspace chart
You should see either five separate records or one combined record:

"Squarespace help table with icons"
- Add Missing Records:
- If records are missing, select "Google Workspace MX" from "Add a preset option"
- System will automatically add required records
- No manual entry needed
For Third-Party Domains:
- Follow Google's documentation for your specific provider
- Add MX records through your domain provider's DNS settings
For Subdomains:
- Add single MX record:
- Host: Enter subdomain (example: subdomain)
- Type: MX
- Priority: 10
- Data: smtp.google.com
Important Notes:
- DNS changes take up to 72 hours to propagate
- If email issues persist after 72 hours, contact support
- Delete existing email-related records before adding new ones
- Records are usually added automatically during initial setup
Troubleshooting:
- Verify domain connection
- Check subscription status
- Monitor for spam-related issues
- Ensure correct record configuration


