How to Create and Edit Email Campaigns: A Step-by-Step Guide
Email campaigns consist of vertically stacked sections containing content like text, images, and buttons. Each section spans the full width of the email, with a header at the top and footer at the bottom.
To create a new campaign:
- Open the Email Marketing dashboard
- Click Create and choose:
- Blast: Single campaign sent to mailing lists
- Automation: Pre-set email triggered by specific actions

Small chocolate product in packaging
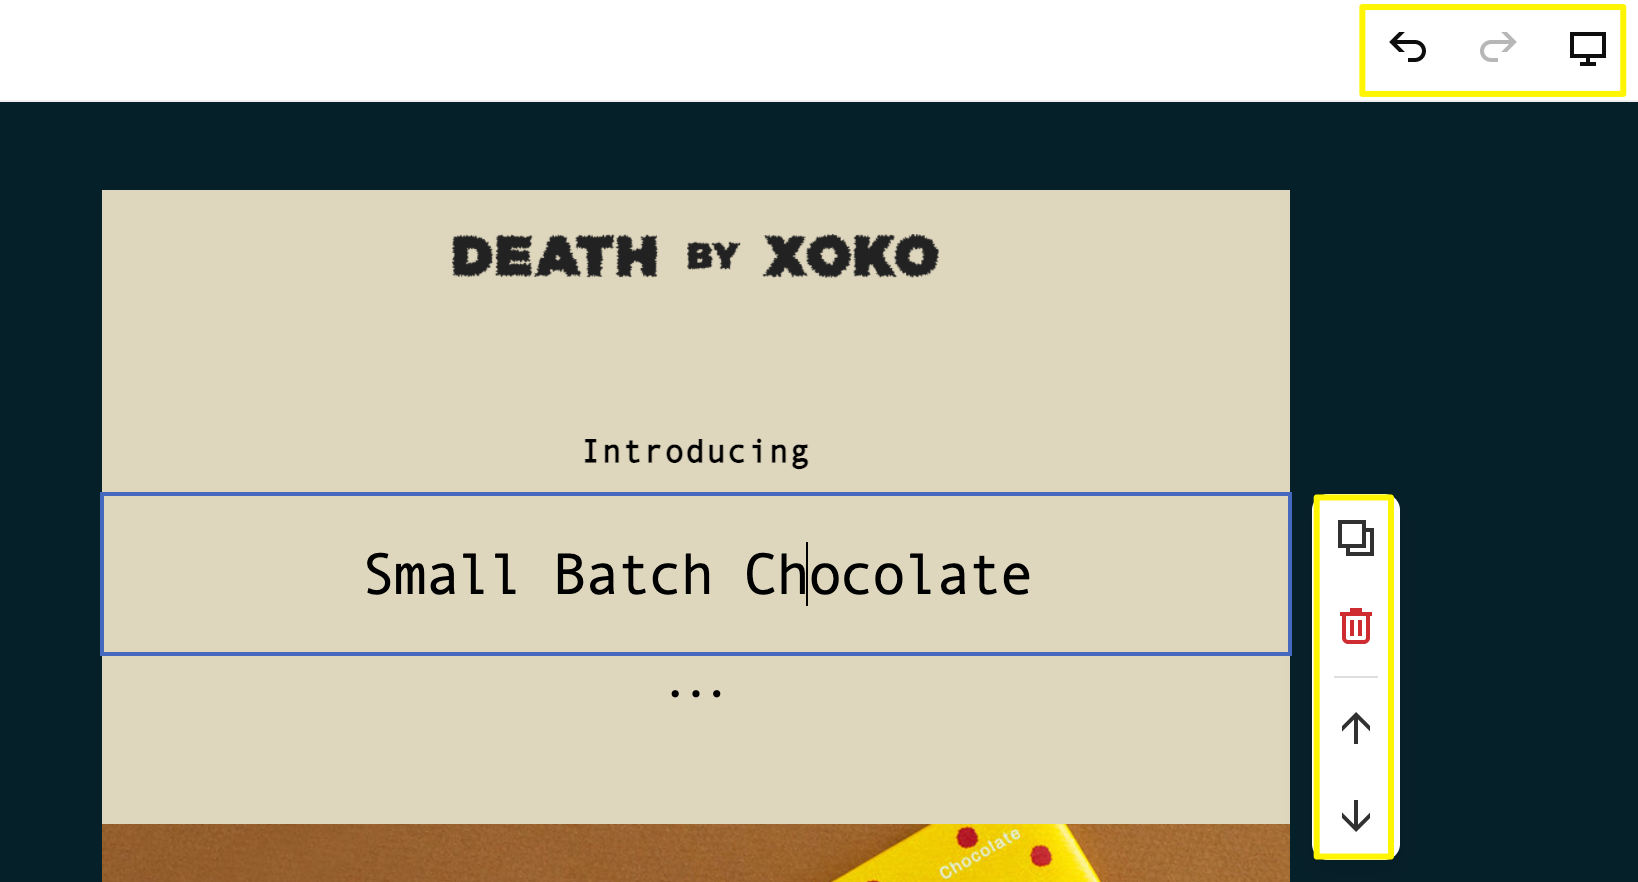
Adding and Editing Sections:
- Click + to add new sections
- Click any section to edit in the right-side menu
- Use ↑↓ arrows to reorder sections
- Click copy icon to duplicate sections
- Click trash icon to delete sections
Handmade chocolate pralines in a box
Header Options:
- Image: Upload or choose from library
- Logo: Use website logo
- Text: Add personalized content
- Title: Add email title or slogan
- View in Browser link
- Customize layout, background, padding, and fonts
Footer Elements (Required):
- Unsubscribe link
- Postal address
- Optional: Logo, brand name, social media icons
- Customizable layout and styling
Content Section Types:
- Text
- Images
- Buttons
- Spacers
- Lines
- Blog
- Product
- Discount
Template Management:
- Save and reuse templates
- Convert between blast and automation campaigns
- Edit drafts any time
- Delete unused drafts permanently
Best Practices:
- Review content thoroughly before sending
- Use email merge tags for personalization
- Follow accessibility guidelines
- Test display on mobile devices using Device View
- Maintain consistent branding across campaigns
All changes save automatically. Review your campaign across devices before sending to ensure professional presentation and effectiveness.
Related Articles
How to Set Up and Grow Email Lists with Squarespace Forms