
How to Transfer Your Hover Domain to Squarespace: Step-by-Step Guide
Domain transfers from Hover to Squarespace require unlocking your domain, obtaining an authorization code, and following specific steps. Here's how to complete the process:
Before Starting:
- Review pricing and billing information
- Check domain transfer requirements
- Consider timing implications
- Plan for custom email address migration
Step-by-Step Transfer Process:
- Access Hover Control Panel
- Go to www.hover.com
- Select Control Panel from Login dropdown
- Sign in and select your domain
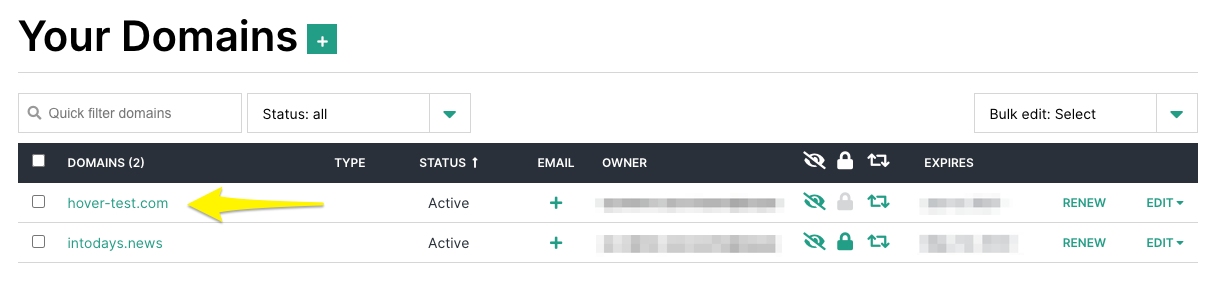
Domain settings of the website
- Unlock the Domain
- Verify Transfer Lock is disabled
- If locked, click to disable
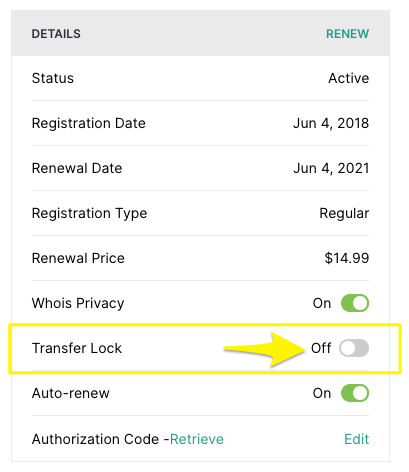
Settings menu with switch
- Get Authorization Code
- Click Retrieve next to Authorization Code
- Copy and save the code
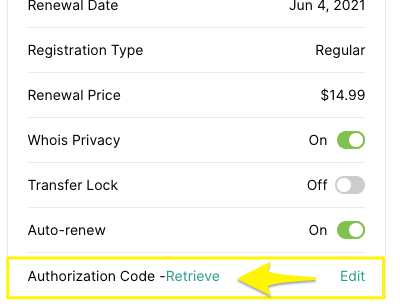
"Highlighted authorization code button"
- Verify Contact Information
- Check Admin contact details
- Update email if needed
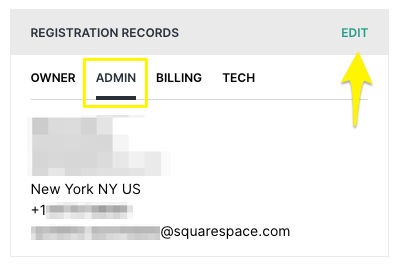
Edit registrations highlighted
- Initiate Transfer in Squarespace
- Go to Domains panel
- Click "Use a domain I own"
- Enter domain name
- Input authorization code
- Complete Registration Details
- Verify contact information
- Update if necessary
- Confirm Payment Information
- Enter or verify payment method
- Review charges
- Review and Confirm Order
- Check transfer details
- Confirm additional year registration
- Accept terms
- Accept Transfer Email
- Watch for email from Hover
- Approve transfer within 5 days
- Monitor Transfer Status
- Check Domains panel
- Address any error messages
Important Notes:
- Transfers typically take up to 15 days
- Don't modify DNS settings during transfer
- Keep existing MX records if using custom email
- Wait for transfer completion before adding integrations
After Transfer Completion:
- Cancel Hover hosting if needed
- Set domain as primary
- Enable SSL encryption
- Add custom email if desired
- Review domain invoice
The transfer is complete when you receive confirmation from [email protected] and see a green label in your Domains panel.
Related Articles
DNS Propagation: Why Domain Changes Take Up to 48 Hours