How to Verify Third-Party Domains for Email Marketing: A Complete Guide
Custom Domain Verification for Email Marketing
Verifying your custom domain is crucial for preventing email campaigns from being marked as spam. A custom email uses your domain (e.g., [email protected]) instead of a generic address.
Domain Verification Methods:
- Automatic verification for Squarespace-registered domains
- Transfer third-party domain to Squarespace for automatic verification
- Manually add verification records to third-party DNS settings

Domain DNS Settings
Manual Verification Process:
- Access DNS Settings:
- For nameserver-connected domains: Use DNS Settings panel
- For DNS-connected domains: Modify records through your provider
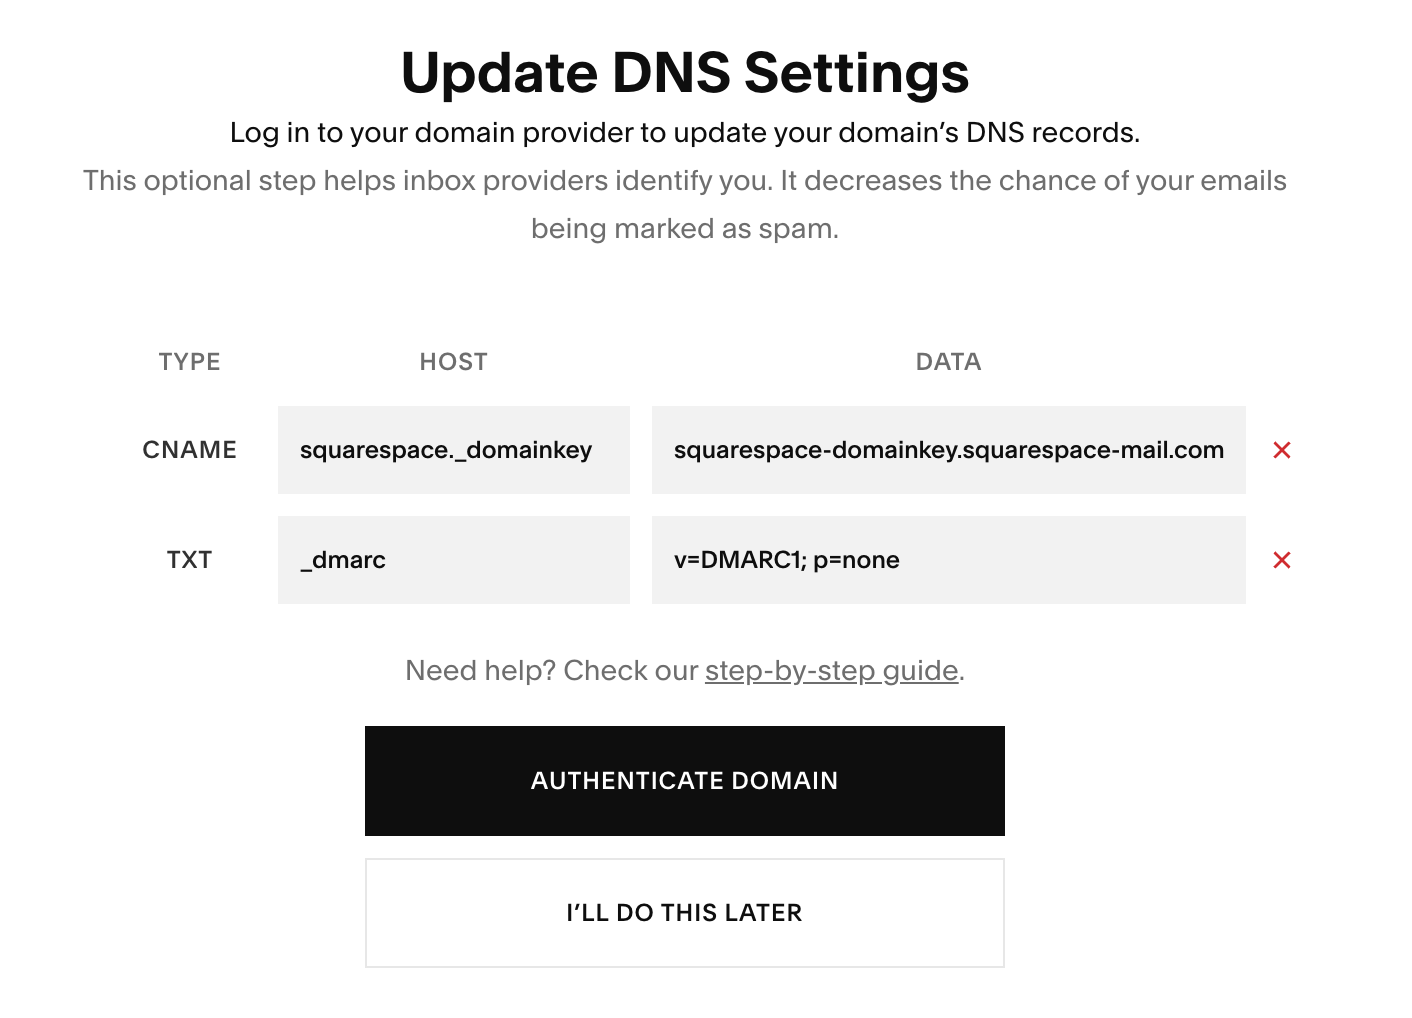
- Add Required Records:
-
First Record (CNAME):
- Type: CNAME
- Host: squarespace._domainkey
- Data: squarespace-domainkey.squarespace-mail.com
-
Second Record (TXT):
- Type: TXT
- Host: _dmarc
- Data: [unique code provided]
Provider-Specific Instructions:
IONOS:
- Login to my.ionos.com/domains
- Select domain > DNS
- Click Add Record
- Enter CNAME and TXT records
GoDaddy:
- Access Domain Manager
- Navigate to Manage DNS
- Add both records under DNS Records
Google Domains:
- Login to domains.google
- Click DNS icon
- Add records under Custom Resource Records
Hover:
- Login to hover.com
- Select DNS
- Add both records
Namecheap:
- Access Domain List
- Select Manage > Advanced DNS
- Add both records
Important Notes:
- Record updates may take up to 72 hours
- Verification is complete when "Unauthenticated Domain" message disappears
- Contact your provider's support for specific guidance
- DMARC policy set to p=reject requires domain verification before use
Related Articles

Fonts Discontinued: Important Updates to Available Font Catalog

